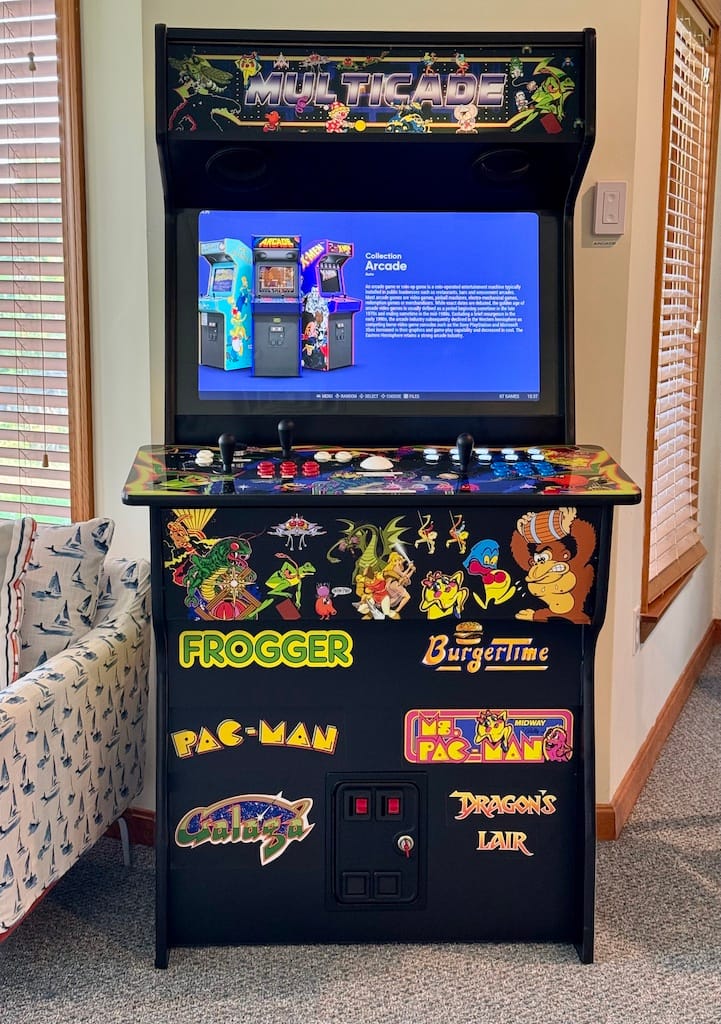
I recently put the finishing touches on an arcade machine for home, fulfilling a long held childhood dream. While this started as a simple project - buy an arcade machine - the more I researched the topic, the more I realized that every option came with tradeoffs. While it’s all still fresh in my mind, I thought I’d pass on what I learned for anyone else out there looking to have a home arcade machine.
My Requirements
I grew up during the golden age of arcades, in an era when video games were still a novelty and your local arcade was a showcase in the latest and greatest games and technology. My arcade was located on a dead end corridor in a shopping mall, in a modest space packed with machines that cast their glow into an otherwise dark room. The black overhead lights lit up little more than the neon color patterns on the dark rug, leaving most of the room to be illuminated by the warm flickering cathode ray tube monitors. Near the entrance, a change machine whirred and clinked as dollar bills were exchanged for quarters, and as you stepped from the mall and into the arcade, a cacophony of music and sound effects overwhelmed you, with one machine and then another rising up to catch your interest.
While I haven’t been in an arcade in over 35 years, these memories remain seared in my brain. An arcade for me has represented many things - e.g. entertainment, excitement, possibility. It was a place I could go to feel at home, and often to be amazed by technology - e.g. the 3D isometric graphics of Zaxxon, the realistic animations of Dragon’s Lair, or the voices of the real Star Wars actors coming from a machine (“Great shot, kid!”). There was a direct line from these early arcade experiences to my eventual career in software.
I wanted to recreate as much of that early arcade experience as I could at home with this project, and for me this meant meeting the following requirements:
- Commercial grade cabinet - The arcade machines I grew up with were built around commercial-grade cabinets that could stand up to rigorous play. My machine needed to be sufficiently heavy that it didn’t jostle, with dimensions that could comfortably accommodate two players.
- Heavy-duty control panel - I required controls that could withstand heavy use without breaking, especially from button-mashing games like Track and Field. While my arcade machine would never undergo the rough treatment of a commercial arcade machine, it still needed to be built to last.
- Multiple games - While there was an allure to buying a real vintage machine from the 1980s / 1990s, I knew my solution needed to play multiple games from different arcade machines (and possibly even different early consoles). But I also knew I didn’t want one of those libraries containing “thousands of games,” most of which never get played and all of which cheapen the experience. Instead I wanted my library to be carefully curated, with each game having a personal connection.
- Authentic look - While I knew I could never recreate the exact look and feel of a vintage arcade machine, I wanted to come as close as I could. For me, this meant having a full-sized cabinet, a high quality display, a real coin door, great art work on the panels, and a full assortment of controls (e.g. joystick, buttons, spinner, trackball).
- Easy navigation - In choosing to go with a multicade - i.e. a machine with multiple games - I knew the navigation to find and play games would be important. I wanted my arcade machine to be approachable and easy to use for everyone.
- Price - While I wanted all of the above, I also didn’t want to spend excessively for a luxury item that would only be occasionally used.
The Research
At the start of my research, I assumed I would be able to purchase a turnkey arcade machine that just required some assembly. But the more I researched the market, the more I realized it wasn’t that simple. At the low-end of the market are turnkey licensed replica vendors - e.g. Arcade1Up - whose goal is to replicate the experience of a single arcade machine. These vendors provide the full solution - i.e. cabinet, control panel, hardware, software - but unfortunately usually only for a single game. While there was a lot of appeal to these machines in both price ($600-700) and nostalgia, I quickly ruled them out based on the limited games and flimsy cabinets.
Next I turned to the turnkey multicade vendors, with companies such as Dream Arcades, Game Room Solutions and Creative Arcades. These vendors also provide a complete solution - i.e. cabinet, control panel, hardware, software and a pre-loaded library of games - with some even assembling and installing the machine for you. At the high end of this market I found Extreme Home Arcades, with machines starting at $5000 and going up rapidly from there, but offering the greatest customization around a commercial-grade cabinet. While I liked these machines, I didn’t like their price, and found myself leaning for a while toward a lower quality 2-player cabinet from Creative Arcades ($3000+).
But the closer I came to making a purchase, the more I became convinced turnkey multicade vendors might not be the option for me. This led me to the DIY market, which includes full DIY and DIY cabinet vendors.
With the former, you acquire plans and do everything yourself - from building a cabinet to assembling the hardware to installing the software and games. While I was fine with the technical side of a DIY project, the carpentry skills were beyond my ability, and so I quickly focused my attention on the DIY cabinet vendors. Here I found a solution that really intrigued me: Rec Room Masters provided a kit for assembling a commercial-grade cabinet with a heavy-duty control panel that had great reviews and a good price ($1100+). In researching the company, they had established a strong reputation before eventually closing the business, only to have it restarted years later under a different owner. From a recent YouTube review I was able to see the product had improved under the new ownership, with several new nice changes to the cabinets to make them more durable and easier to assemble. All that was required from me was to follow their assembly instructions, fill the cabinet with my own hardware and software, and then start playing. I could even go with a recommended hardware / software partner, Arcade One, if I didn’t want to build out my own retro game console.
Assembling a Retro Game Console
Once I decided on the solution, I thought it would be best to build my retro game console before purchasing the cabinet. There are many ways to do this using different operating systems (e.g. Windows or Linux), emulators (e.g. MAME), and frontends (e.g. LaunchBox). I eventually settled on Batocera.linux, a Linux distribution built around the open-sourced emulation platform Batocera. This approach provided out-of-the-box support for a wide selection of gaming platforms, from arcades to consoles to handhelds, all preconfigured, and with the configurability I wanted.
Next I purchased my hardware: a Beelink mini-PC, a 32” Samsung monitor, a keyboard with integrated mousepad, and cheap speakers (since I would purchase built-in speakers with my Rec Room Masters cabinet). While the new mini-PC was relatively inexpensive, I would suggest buying a used one from eBay (easily less than $120), since retro gaming doesn’t require a lot of computing power. For controllers I briefly considered purchasing an X-Arcade Tankstick ($199) before settling on reusing a couple of my son’s PS4 controllers as an interim solution - since again my Rec Room Masters cabinet would come with a control panel.
Once all my hardware arrived, I created a Batocera.linux installation boot USB using the Raspberry Pi Imager, installed the operating system, and immediately started testing it out. I was happy to find that Batocera.linux came preconfigured with a few default games, including one of my favorites from the 1990s: Doom. I found the navigation simple and highly customizable, and was impressed with the community-driven themes that were available to personalize my system.
Acquiring Games
Next I started looking into the acquisition of games. With a turnkey system, you can rely on a vendor to acquire properly licensed games for your machine (although you have no way to verify this). Unfortunately with a DIY solution, you are responsible for the acquisition and licensing of all your games.
While I can’t suggest how to navigate this challenge, I can pass on a few things you should know in advance:
- Availability on the Internet doesn’t make them free - Due to the proliferation of often sketchy download sites and the existence of the non-profit Archive.org, digital versions of almost any game - from 1970s arcade titles to the latest PS5 release - will be available on the internet. While a few of the games online come with licenses that are free to use for non-commercial, the vast majority are not.
- Emulation licensing - Owning a legal license to a game - e.g. Lego Star Wars for the PS2 - doesn’t grant you permission to run it on another platform under emulation. Unfortunately most game licenses restrict you to only using it on the game console for which it was designed.
- Abandonware - Just because a manufacturer goes out of business doesn’t mean their games are in the public domain. In many cases, the intellectual property has been acquired by other companies that retain the rights. In a few cases - e.g. the former game company Exidy - the owner will grant the use of some games for non-commercial use.
- Un-licensable games - In many cases the owner of the intellectual property for a game will license it only to distributors, but not consumers. While this is often driven by their business model or concerns about piracy, it does make acquiring legal licenses for many games to be very difficult
- Don’t forget BIOSs are licensed too - While Batocera comes with built-in emulation for platforms such as the Apple II, it requires a valid BIOS to work. BIOSs, like games, are copyrighted and protected.
- Retro gaming hard drives - A quick search of Amazon will show you a variety of hard drives and USBs for sale offering a collection of retro games. While this is an easy way to acquire a large library, you have no way of knowing if these vendors are acquiring legitimate licenses for the games they are providing.
While how you navigate this is entirely up to you, there are some options to look into:
- Free content - The good news is there is a lot of freeware available on the internet, including clones of games from the arcade era and even new arcade games being released for emulators. While it takes a little searching to find them, they are definitely out there.
- Retro game collections - One of the best sources of game collections are the retro releases, which usually involve some hardware - e.g. a replica of the Atari 2600. While most of these are licensed only to run on the specific hardware they deliver, a few are designed for emulation - e.g. Capcom Beat ‘Em Up Bundle. While you need to carefully review license agreements, these are often a way of acquiring legitimate rights to run a game under emulation.
My hope is that someday someone will create the Spotify for retro games.
Assembling the Cabinet
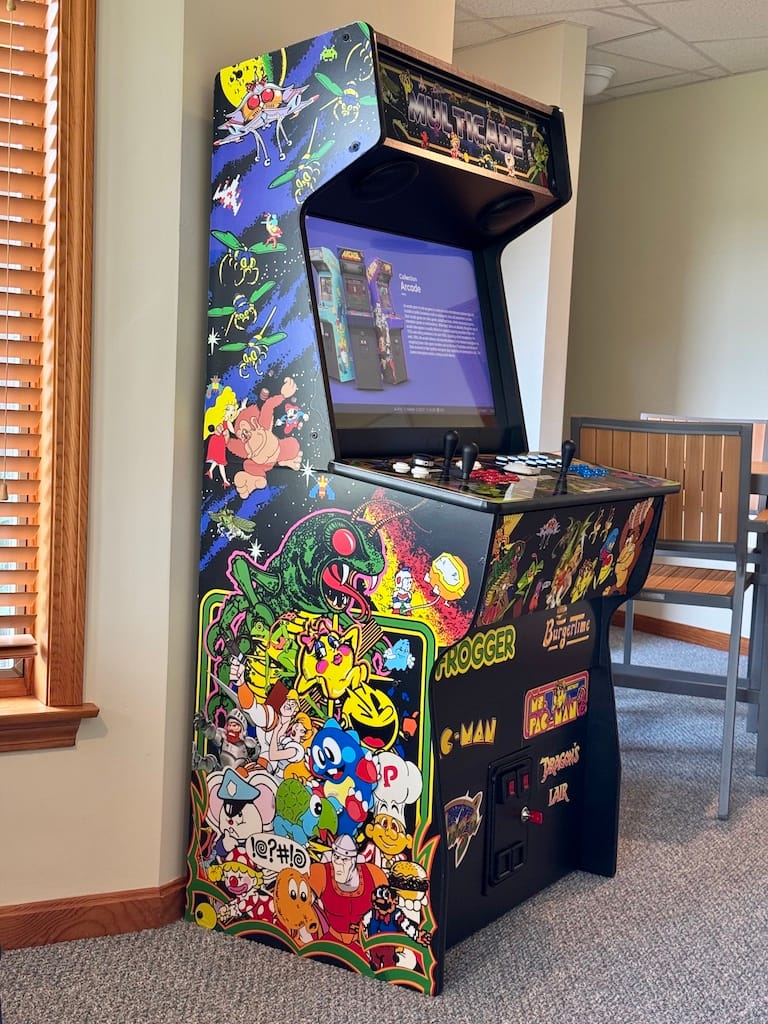
After proving out the usability of my retro game console on our annual Cape Cod family vacation, I knew there was only one thing to do: purchase the cabinet. I chose to go with the Upright Xtension 2 Player Arcade Machine with the Emulator Edition Plus control panel, custom artwork, speakers and a double coin door slot.
While I anxiously waited for it to arrive, I watched both instructional videos by Rec Room Masters and third party reviews (e.g. ArcadeAdam review). I found this helpful in preparing me for the assembly project I had ahead of me.
Four weeks after placing the order, seven packages arrived at my doorstep, each carefully wrapped. I unboxed all the items, and laid them out on my game room floor. The next day I woke up early to start the assembly. Since the instructions were all videos, I set up my laptop nearby, and stopped and started the videos as I worked. While I think Rec Room Masters estimates 2-3 hours to assemble the cabinet, I am pretty sure I spent 4-5 hours (not including the unboxing). That said, I am not the handiest person around, and still found this a very manageable assembly project.
I did encounter a few minor issues that I passed on to the vendor:
- Dowel holes - Many of the dowel holes were cut too deep, leaving only a small part of the dowel visible after inserting it. I ended up stuffing balls of wadded paper into the holes to workaround this issue.
- Monitor screws - Based on vendor recommendations, I purchased a Samsung Odyssey G3 monitor. Unfortunately the G3 has a bevel in the back such that once you place two of the screws into the Rec Room Masters TV mount, the two remaining screws aren't long enough. I was able to workaround this however by going to my local hardware store to purchase two longer screws and some washers.
- Speaker screws - My order was missing several types of screws for the speakers, with one type being very small and hard to source. But again with the help of my local hardware store, I was able to jerry rig a solution that worked.
- Coin door - While the video instructions were very clear about the placement of the panel for the coin door, I managed to install it upside down. I unfortunately only realized this after completing the majority of the assembly. Since the coin door was for show for me, I decided I would just live with it as is.
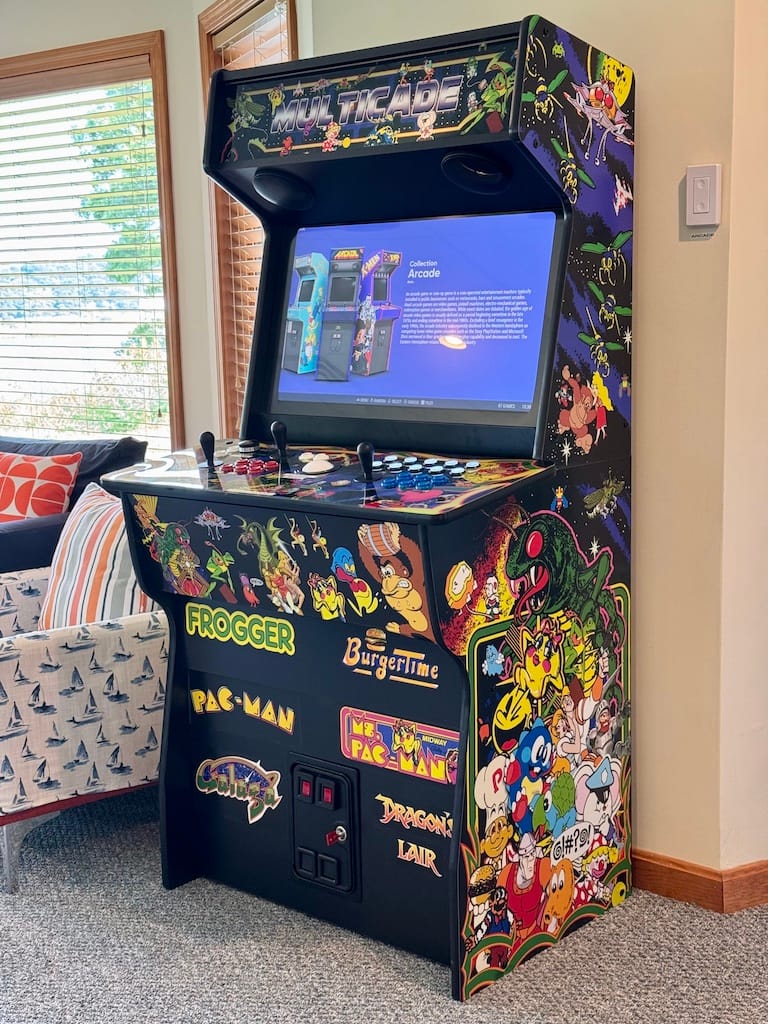
After completing the build, I added a few small finishing touches to make it usable for all my needs. This included adding a USB hub in the keyboard drawer to make it easy to connect in PS4 controllers (a few games would need this), placing the speaker control board within easy reach, adding a machine on/off button on the side of the wall, and taping instructions to the inside the keyboard drawer for non-obvious games (e.g. keyboard games).
Customizing Batocera
I will confess that I spent a lot more time than expected customizing Batocera. While there are a lot of easy changes you can make to improve the out-of-box experience - e.g. applying a theme, customizing the collections - there other changes that take some time. Some of the changes I made here include:
- Testing out games under different emulators to get the best play (some games won't play under specific emulators, and others have quirks - e.g. sound delays)
- Configuring the spinner and trackball for games that required them
- Customizing control configuration for retro games that had special controls that I will never have - e.g. driving game that used steering wheels, gear shift and brake / gas pedals
- Optimizing a game's use of button layout to make them more intuitive / natural
- Enabling high score retention within games
- Ensuring special combo moves are properly mapped in games - i.e. 2-3 buttons pressed at once to make a special maneuver
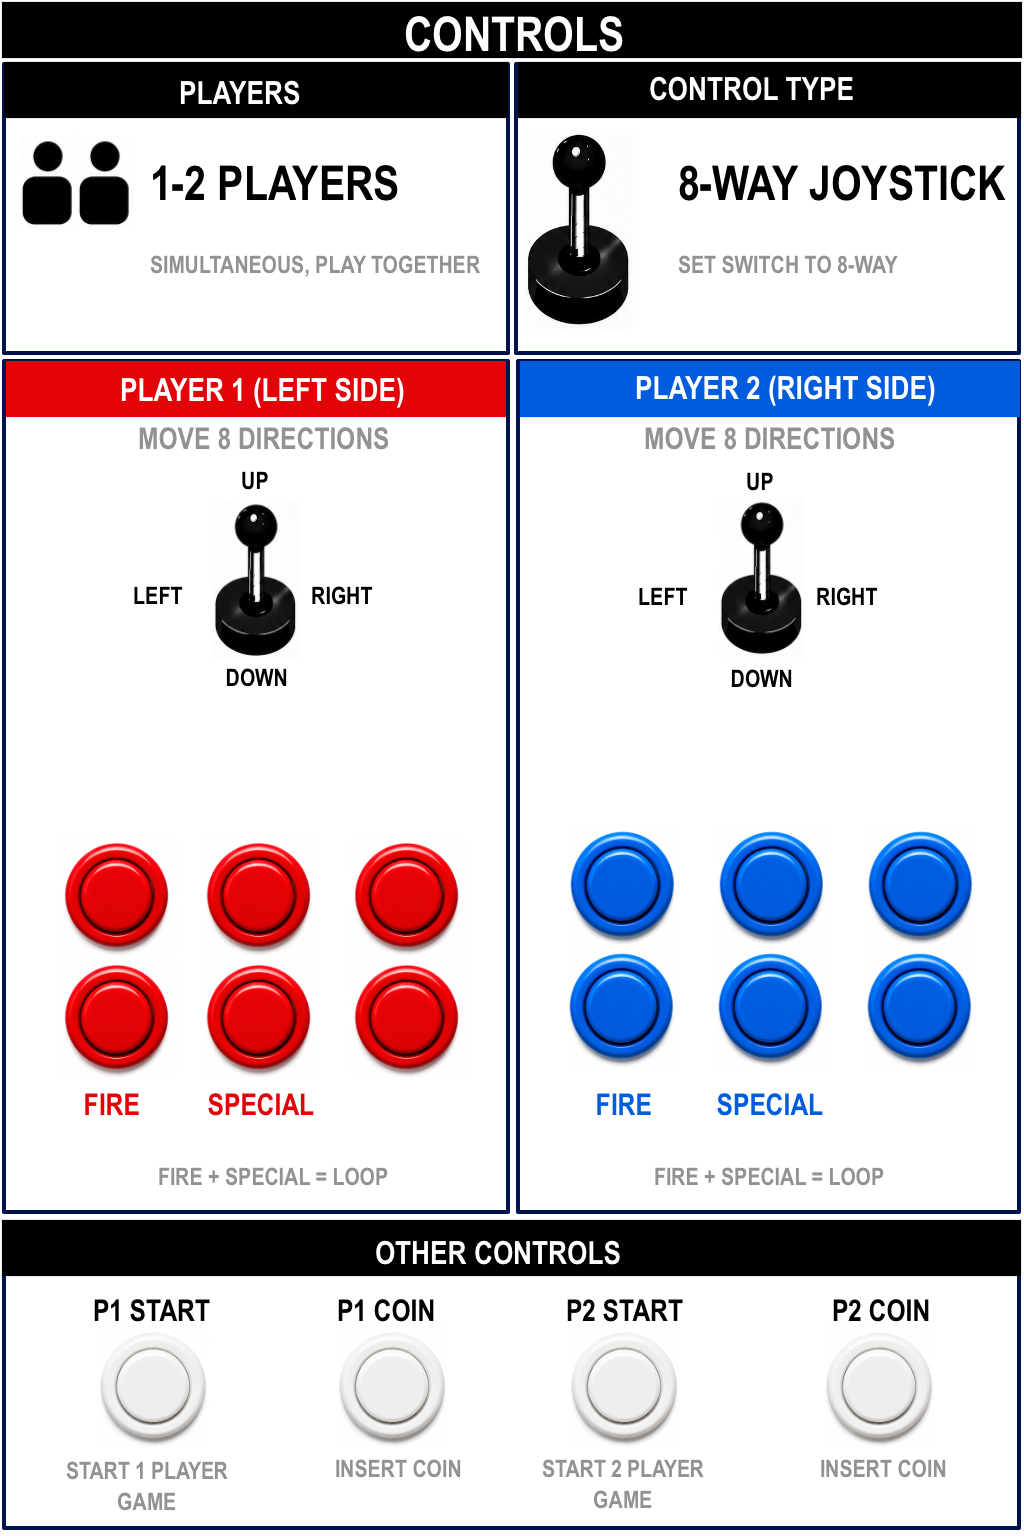
I also created special information cards that I integrated into my theme to show on game launch that provide play information to users. While this was a little labor intensive, it makes for a much better experience, especially for games with more complex buttons. Below is an example:
The Results
The result of my project is everything I hoped it would be: a machine that looks & feels like a real arcade machine from back in the day, captures the nostalgia of my youth, but still plays like a modern game console. This is all delivered via an attractive commercial-grade cabinet, with heavy-duty controls that are made for rigorous play. It also has an easy to use interface that I have highly customized for my specific needs. And while I spent more than I ideally wanted to on this project, it came in well below what I would have paid for an equivalent turnkey solution.
Overall: I give my new arcade machine, Batocera and Rec Room Masters a strong thumbs up. 👍